创建高可用集群
一、资源准备
1.1 机器列表
| 序号 | IP | 角色 | 配置 | 操作系统 |
|---|---|---|---|---|
| 1 | 10.10.217.25 | master | 4核8G | Centos7 |
| 2 | 10.10.217.64 | master | 4核8G | Centos7 |
| 3 | 10.10.217.83 | master | 4核8G | Centos7 |
| 4 | 10.10.217.251 | vip | - | - |
| 5 | 10.10.217.60 | worker | 16核32G | Centos7 |
| 6 | 10.10.217.106 | worker | 16核32G | Centos7 |
| 7 | 10.10.217.120 | worker | 16核32G | Centos7 |
在设置VIP的时候,需要把源IP(10.10.217.25、10.10.217.64、10.10.217.83)的安全策略(比如OpenStack的安全策略,防火墙等)关闭
1.2 先决条件
允许 iptables 检查桥接流量
执行下述指令:
cat <<EOF | sudo tee /etc/modules-load.d/k8s.conf
overlay
br_netfilter
EOF

sudo modprobe overlay
sudo modprobe br_netfilter

# 设置所需的 sysctl 参数,参数在重新启动后保持不变
cat <<EOF | sudo tee /etc/sysctl.d/k8s.conf
net.bridge.bridge-nf-call-iptables  = 1
net.bridge.bridge-nf-call-ip6tables = 1
net.ipv4.ip_forward                 = 1
EOF

# 应用 sysctl 参数而不重新启动
sudo sysctl --system
通过运行以下指令确认 br_netfilter 和 overlay 模块被加载:
lsmod | grep br_netfilter
lsmod | grep overlay
通过运行以下指令确认 net.bridge.bridge-nf-call-iptables、net.bridge.bridge-nf-call-ip6tables 和 net.ipv4.ip_forward 系统变量在你的 sysctl 配置中被设置为 1:
sysctl net.bridge.bridge-nf-call-iptables net.bridge.bridge-nf-call-ip6tables net.ipv4.ip_forward
二、安装containerd运行时
本文的所有步骤需要在所有master节点和worker节点都执行。
2.1 安装containerd
2.1.1 下载containerd安装包
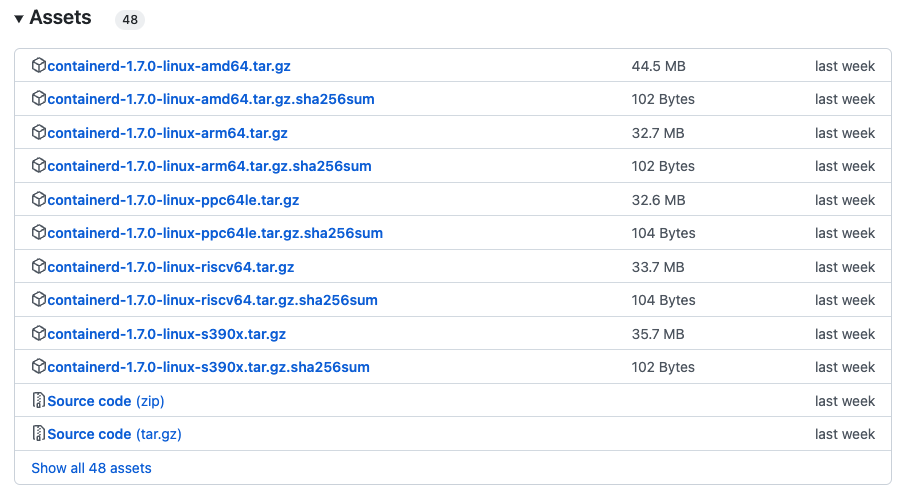
在https://github.com/containerd/containerd/releases上下载安装包,并解压到/usr/local目录
解压:
tar Cxzvf /usr/local containerd-1.7.0-linux-amd64.tar.gz
在 Linux 上,containerd 的默认 CRI 套接字是 /run/containerd/containerd.sock
2.1.2、配置为systemd服务
从https://raw.githubusercontent.com/containerd/containerd/main/containerd.service下载containerd.service文件,放到/usr/local/lib/systemd/system/containerd.service
mkdir -p /usr/local/lib/systemd/system
cp containerd.service /usr/local/lib/systemd/system/containerd.service

systemctl daemon-reload
systemctl enable --now containerd
2.1.3、生成配置文件
containerd使用/etc/containerd/config.toml配置文件来指定守护进程级别的选项。可以在这里找到一个示例配置文件。
可以通过containerd config default > /etc/containerd/config.toml生成config.toml默认配置
mkdir -p /etc/containerd
containerd config default > /etc/containerd/config.toml
2.1.4、配置 systemd cgroup 驱动
结合 runc 使用 systemd cgroup 驱动,在 /etc/containerd/config.toml 中设置:
[plugins."io.containerd.grpc.v1.cri".containerd.runtimes.runc]
  ...
  [plugins."io.containerd.grpc.v1.cri".containerd.runtimes.runc.options]
    SystemdCgroup = true
2.1.5、重载沙箱(pause)镜像
在 /etc/containerd/config.toml 中设置, 你可以通过设置以下选项重载沙箱镜像:
[plugins."io.containerd.grpc.v1.cri"]
  sandbox_image = "registry.aliyuncs.com/google_containers/pause:3.8"
2.1.6、重启 containerd
sudo systemctl restart containerd
2.2 安装runc
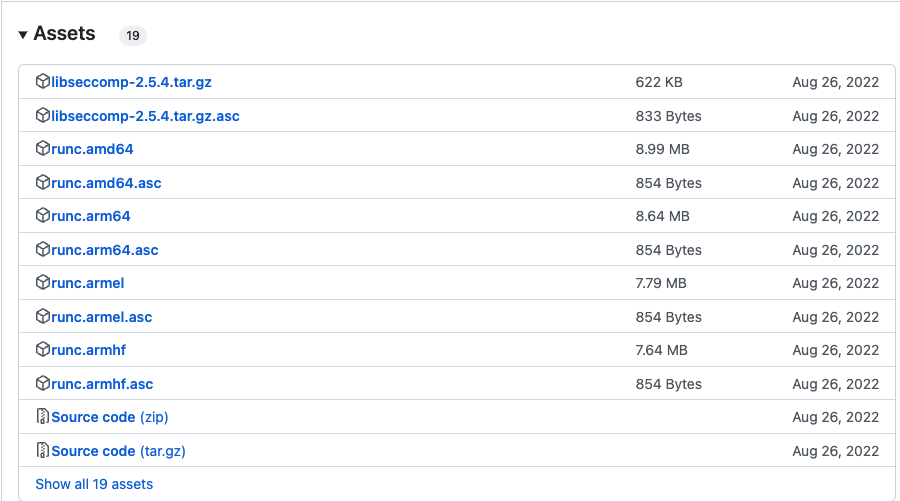
从https://github.com/opencontainers/runc/releases下载二进制文件,安装到/usr/local/sbin/runc
 安装:
安装:
install -m 755 runc.amd64 /usr/local/sbin/runc
2.3 安装CNI插件
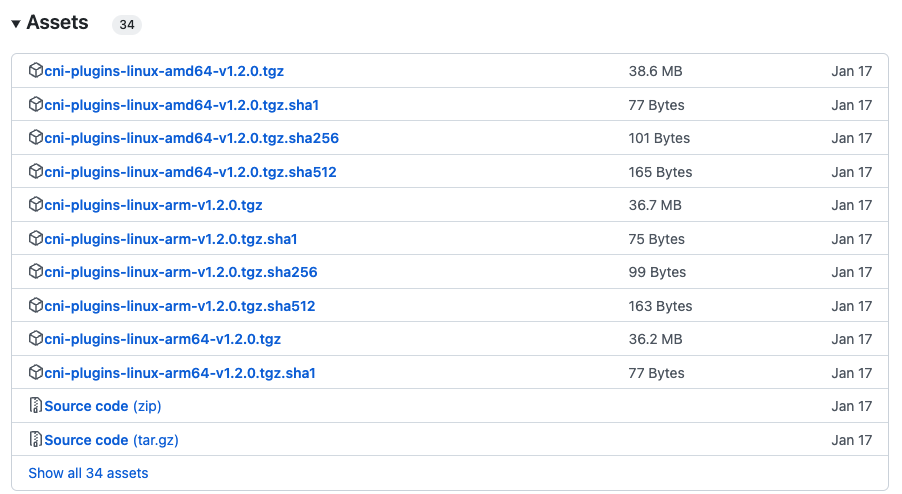
从https://github.com/containernetworking/plugins/releases下载二进制文件,解压到/opt/cni/bin目录下
解压:
mkdir -p /opt/cni/bin
tar Cxzvf /opt/cni/bin cni-plugins-linux-amd64-v1.2.0.tgz
三、安装kubeadm
本文的所有步骤需要在所有master节点和worker节点都执行。
3.1 环境检查
3.1.1、确保每个节点上 MAC 地址和 product_uuid 的唯一性
# 获取网络接口的 MAC 地址
ifconfig -a

# 对 product_uuid 校验
sudo cat /sys/class/dmi/id/product_uuid
3.1.2、检查所需端口
启用这些必要的端口后才能使 Kubernetes 的各组件相互通信:
nc 127.0.0.1 6443
3.1.3、禁用交换分区
# 不重启电脑,禁用启用swap,立刻生效
sudo swapoff -a
修改配置文件 - /etc/fstab
删除swap相关行 /mnt/swap swap swap defaults 0 0 这一行或者注释掉这一行
执行free -m命令,若swap行都显示 0 则表示关闭成功
3.2 安装 kubeadm、kubelet 和 kubectl
你需要在每台机器上安装以下的软件包:
kubeadm:用来初始化集群的指令。kubelet:在集群中的每个节点上用来启动 Pod 和容器等。kubectl:用来与集群通信的命令行工具。
kubeadm 不能帮你安装或者管理 kubelet 或 kubectl, 所以你需要确保它们与通过 kubeadm 安装的控制平面的版本相匹配。
# 国内yum源
cat <<EOF | sudo tee /etc/yum.repos.d/kubernetes.repo
[kubernetes]
name=Kubernetes
baseurl=https://mirrors.aliyun.com/kubernetes/yum/repos/kubernetes-el7-x86_64/
enabled=1
gpgcheck=1
repo_gpgcheck=1
gpgkey=https://mirrors.aliyun.com/kubernetes/yum/doc/yum-key.gpg https://mirrors.aliyun.com/kubernetes/yum/doc/rpm-package-key.gpg
EOF

# 将 SELinux 设置为 permissive 模式(相当于将其禁用)
sudo setenforce 0
sudo sed -i 's/^SELINUX=enforcing$/SELINUX=permissive/' /etc/selinux/config

# 安装kubelet kubeadm kubectl
sudo yum install -y kubelet-1.25.8 kubeadm-1.25.8 kubectl-1.25.8 --disableexcludes=kubernetes

# 设置开机启动,此时kubelet运行会报错,先不用管
sudo systemctl enable kubelet && systemctl start kubelet
- 通过运行命令 setenforce 0 和 sed ... 将 SELinux 设置为 permissive 模式可以有效地将其禁用。 这是允许容器访问主机文件系统所必需的,而这些操作是为了 Pod 网络工作正常。
- 如果由于该 Red Hat 的发行版无法解析 basearch 导致获取 baseurl 失败,请将 \$basearch 替换为你计算机的架构。 输入 uname -m 以查看该值。 例如,x86_64 的 baseurl URL 可以是:https://mirrors.aliyun.com/kubernetes/yum/repos/kubernetes-el7-x86_64
kubelet 现在每隔几秒就会重启,因为它陷入了一个等待 kubeadm 指令的死循环。
如果安装失败,可以用如下命令清理:
yum remove -y kubelet kubeadm kubectl
四、安装负载均衡器
本文的所有步骤需要在所有master节点都执行。
4.1 安装keepalived
4.1.1、通过yum安装keepalived
yum -y install keepalived
4.1.2、配置keepalived
修改keepalived配置文件/etc/keepalived/keepalived.conf,注意这里主和备的配置在state字段值分别为MASTER和BACKUP,其他一样。
keepalived MASTER
# keepalived主机器配置
! /etc/keepalived/keepalived.conf
! Configuration File for keepalived
global_defs {
    router_id LVS_DEVEL
}
vrrp_script check_apiserver {
  script "/etc/keepalived/check_apiserver.sh"
  interval 3
  weight -2
  fall 10
  rise 2
}

vrrp_instance VI_1 {
    state MASTER
    interface eth0
    virtual_router_id 51
    priority 100
    authentication {
        auth_type PASS
        auth_pass 42
    }
    virtual_ipaddress {
        10.10.217.251/24
    }
    track_script {
        check_apiserver
    }
}
keepalived BACKUP(两台)
# keepalived主机器配置
! /etc/keepalived/keepalived.conf
! Configuration File for keepalived
global_defs {
    router_id LVS_DEVEL
}
vrrp_script check_apiserver {
  script "/etc/keepalived/check_apiserver.sh"
  interval 3
  weight -2
  fall 10
  rise 2
}

vrrp_instance VI_1 {
    state BACKUP
    interface eth0
    virtual_router_id 51
    priority 100
    authentication {
        auth_type PASS
        auth_pass 42
    }
    virtual_ipaddress {
        10.10.217.251/24
    }
    track_script {
        check_apiserver
    }
}
keepalived检查脚本
创建/etc/keepalived/check_apiserver.sh文件,内容如下:
#!/bin/sh

errorExit() {
    echo "*** $*" 1>&2
    exit 1
}

curl --silent --max-time 2 --insecure https://localhost:6443/ -o /dev/null || errorExit "Error GET https://localhost:6443/"
if ip addr | grep -q 10.10.217.251; then
    curl --silent --max-time 2 --insecure https://10.10.217.251:6443/ -o /dev/null || errorExit "Error GET https://10.10.217.251:6443/"
fi
4.1.3、启动keepalived
#启动keepalived并开机启动
systemctl start keepalived && systemctl enable keepalived

#查看IP配置
ip a
# ip a输出,VIP已经配置成功
1: lo: <LOOPBACK,UP,LOWER_UP> mtu 65536 qdisc noqueue state UNKNOWN group default qlen 1000
    link/loopback 00:00:00:00:00:00 brd 00:00:00:00:00:00
    inet 127.0.0.1/8 scope host lo
       valid_lft forever preferred_lft forever
2: eth0: <BROADCAST,MULTICAST,UP,LOWER_UP> mtu 1500 qdisc pfifo_fast state UP group default qlen 1000
    link/ether fa:16:3e:4a:13:26 brd ff:ff:ff:ff:ff:ff
    inet 10.10.217.25/24 brd 10.10.217.255 scope global noprefixroute eth0
       valid_lft forever preferred_lft forever
    inet 10.10.217.251/24 scope global secondary eth0
       valid_lft forever preferred_lft forever
4.2 安装Haproxy
4.2.1、通过yum安装haproxy
yum -y install haproxy
4.2.2、配置haproxy
修改keepalived配置文件/etc/keepalived/ haproxy.cfg:
# /etc/haproxy/haproxy.cfg
#---------------------------------------------------------------------
# Global settings
#---------------------------------------------------------------------
global
    log /dev/log local0
    log /dev/log local1 notice
    daemon

#---------------------------------------------------------------------
# common defaults that all the 'listen' and 'backend' sections will
# use if not designated in their block
#---------------------------------------------------------------------
defaults
    mode                    http
    log                     global
    option                  httplog
    option                  dontlognull
    option http-server-close
    option forwardfor       except 127.0.0.0/8
    option                  redispatch
    retries                 1
    timeout http-request    10s
    timeout queue           20s
    timeout connect         5s
    timeout client          20s
    timeout server          20s
    timeout http-keep-alive 10s
    timeout check           10s

#---------------------------------------------------------------------
# apiserver frontend which proxys to the control plane nodes
#---------------------------------------------------------------------
frontend apiserver
    bind *:16443
    mode tcp
    option tcplog
    default_backend apiserver

#---------------------------------------------------------------------
# round robin balancing for apiserver
#---------------------------------------------------------------------
backend apiserver
    option httpchk GET /healthz
    http-check expect status 200
    mode tcp
    option ssl-hello-chk
    balance     roundrobin
        server szsjhl-daocloud-test-10-10-217-25-vm.lan 10.10.217.25:6443 check
        server szsjhl-daocloud-test-10-10-217-64-vm.lan 10.10.217.64:6443 check
        server szsjhl-daocloud-test-10-10-217-83-vm.lan 10.10.217.83:6443 check
4.2.3、启动haproxy
#启动haproxy并开机启动
systemctl start haproxy && systemctl enable haproxy
五、使用kubeadm创建高可用集群
本文的部分内容需要在单台master上执行后,在其他master种执行kubeadm join命令初始化其他master节点
本章节介绍使用 kubeadm 创建一个高可用的 Kubernetes 集群,其中 etcd 和 master 节点位于同一主机,即堆叠模式,在集群规模大的时候,也可以使用etcd独立部署的模式。
5.1 环境准备
环境要求
- 机器已经安装好
容器运行时,并正常运行 - 在集群中,确保所有计算机之间存在全网络连接(公网或私网)
- 在所有机器上具有 sudo 权限
- 从某台设备通过 SSH 访问系统中所有节点的能力
- 所有机器上已经安装
kubeadm和kubelet
5.2 集群初始化
5.2.1、拉取镜像
# 从阿里云拉取镜像
kubeadm config images pull --image-repository registry.cn-hangzhou.aliyuncs.com/google_containers
输出:
[config/images] Pulled registry.cn-hangzhou.aliyuncs.com/google_containers/kube-apiserver:v1.25.8
[config/images] Pulled registry.cn-hangzhou.aliyuncs.com/google_containers/kube-controller-manager:v1.25.8
[config/images] Pulled registry.cn-hangzhou.aliyuncs.com/google_containers/kube-scheduler:v1.25.8
[config/images] Pulled registry.cn-hangzhou.aliyuncs.com/google_containers/kube-proxy:v1.25.8
[config/images] Pulled registry.cn-hangzhou.aliyuncs.com/google_containers/pause:3.8
[config/images] Pulled registry.cn-hangzhou.aliyuncs.com/google_containers/etcd:3.5.6-0
[config/images] Pulled registry.cn-hangzhou.aliyuncs.com/google_containers/coredns:v1.9.3
5.2.2、初始化集群
# 初始化集群
sudo kubeadm init --control-plane-endpoint "10.10.217.251:16443" --upload-certs --pod-network-cidr=10.100.0.0/16 --service-cidr=10.200.0.0/16 --kubernetes-version=1.25.8 --image-repository registry.cn-hangzhou.aliyuncs.com/google_containers --v=5
kubernetes-version: 用于指定k8s版本;apiserver-advertise-address:用于指定kube-apiserver监听的ip地址,就是 master本机IP地址。pod-network-cidr:用于指定Pod的网络范围; 10.100.0.0/16service-cidr:用于指定SVC的网络范围; 10.200.0.0/16image-repository: 指定阿里云镜像仓库地址
初始化成功,输出以下结果:
Your Kubernetes control-plane has initialized successfully!

To start using your cluster, you need to run the following as a regular user:

  mkdir -p $HOME/.kube
  sudo cp -i /etc/kubernetes/admin.conf $HOME/.kube/config
  sudo chown $(id -u):$(id -g) $HOME/.kube/config

Alternatively, if you are the root user, you can run:

  export KUBECONFIG=/etc/kubernetes/admin.conf

You should now deploy a pod network to the cluster.
Run "kubectl apply -f [podnetwork].yaml" with one of the options listed at:
  https://kubernetes.io/docs/concepts/cluster-administration/addons/

You can now join any number of the control-plane node running the following command on each as root:

  kubeadm join 10.10.217.251:16443 --token egjzhw.tntlnuvjmx2hxihe \
        --discovery-token-ca-cert-hash sha256:53a105b23bffeda6faa5b45b57c262f2524084c2ad4d8ddc5b6a299dea39d0f4 \
        --control-plane --certificate-key 078605ca913a44eefe81455d2dbe42c2fe32efa2e58a46076c2eedd56540c979

Please note that the certificate-key gives access to cluster sensitive data, keep it secret!
As a safeguard, uploaded-certs will be deleted in two hours; If necessary, you can use
"kubeadm init phase upload-certs --upload-certs" to reload certs afterward.

Then you can join any number of worker nodes by running the following on each as root:

kubeadm join 10.10.217.251:16443 --token egjzhw.tntlnuvjmx2hxihe \
        --discovery-token-ca-cert-hash sha256:53a105b23bffeda6faa5b45b57c262f2524084c2ad4d8ddc5b6a299dea39d0f4
执行命令
mkdir -p $HOME/.kube
sudo cp -i /etc/kubernetes/admin.conf $HOME/.kube/config
sudo chown $(id -u):$(id -g) $HOME/.kube/config

export KUBECONFIG=/etc/kubernetes/admin.conf
如果集群初始化失败,用kubeadm reset cleanup-node命令进行重置,重置后还需要手动清理一些资源:
# 清理cni
rm -rf /etc/cni/net.d
# 清理iptables规则
iptables -F
# 清理config
rm -rf $HOME/.kube/config
5.2.3、安装calico网络插件
# 安装tigera-operator
wget https://raw.githubusercontent.com/projectcalico/calico/v3.25.0/manifests/tigera-operator.yaml

# 安装custom-resources
wget https://raw.githubusercontent.com/projectcalico/calico/v3.25.0/manifests/custom-resources.yaml

# 这里使用kubectl create命令,用kubectl apply可能报:metadata.annotations: Too long: must have at most 262144 bytes
kubectl create -f tigera-operator.yml
kubectl create -f custom-resources.yaml

# 移除误点,让pod能调度上去, ${hostname}取当前机器
kubectl taint nodes ${hostname} node.kubernetes.io/not-ready-
kubectl taint nodes ${hostname} node-role.kubernetes.io/control-plane-

# 查看安装状态,知道全部变成Running
watch kubectl get pods -n calico-system
watch输出,全部Running表示安装完成
NAME                                       READY   STATUS    RESTARTS   AGE
calico-kube-controllers-85cd87cb59-q4xh7   1/1     Running   0          2m46s
calico-node-dm4hk                          1/1     Running   0          2m46s
calico-typha-5df478b957-9dklc              1/1     Running   0          2m46s
csi-node-driver-qshmz                      2/2     Running   0          2m24s
如果安装过程中pod状态异常,可以执行describe命令查看pod事件进行分析:
kubectl describe po calico-node-dm4hk -n calico-system
5.2.4、查看calico和coredns的容器状态
 kubectl get pod -n calico-system
 kubectl get pod -n kube-system
如果安装calico失败,需要回滚后重新安装,可执行以下命令删除:
kubectl delete -f https://raw.githubusercontent.com/projectcalico/calico/v3.25.0/manifests/custom-resources.yaml
kubectl delete -f https://raw.githubusercontent.com/projectcalico/calico/v3.25.0/manifests/tigera-operator.yaml
5.3 加入其他控制节点
各控制机器,需要先完成前面一二三四章节的软件安装,才能加入集群。
在工作节点执行以下命令加入集群:
# 控制节点加入集群
kubeadm join 10.10.217.251:16443 --token egjzhw.tntlnuvjmx2hxihe \
        --discovery-token-ca-cert-hash sha256:53a105b23bffeda6faa5b45b57c262f2524084c2ad4d8ddc5b6a299dea39d0f4 \
        --control-plane --certificate-key 078605ca913a44eefe81455d2dbe42c2fe32efa2e58a46076c2eedd56540c979

# 加入成功后,执行如下3条命令设置配置文件
mkdir -p $HOME/.kube
sudo cp -i /etc/kubernetes/admin.conf $HOME/.kube/config
sudo chown $(id -u):$(id -g) $HOME/.kube/config


# 查看加入的机器状态是否变成Ready
watch kubectl get nodes
5.4 加入工作节点
各节点机器,需要先完成前面一二三章节的软件安装,才能加入集群。
在工作节点执行以下命令加入集群:
# 工作节点加入集群
kubeadm join 10.10.217.251:16443 --token egjzhw.tntlnuvjmx2hxihe \
        --discovery-token-ca-cert-hash sha256:53a105b23bffeda6faa5b45b57c262f2524084c2ad4d8ddc5b6a299dea39d0f4

# 查看加入的机器状态是否变成Ready
watch kubectl get nodes
六、安装其他组件
6.1 安装Helm
# 下载安装包,注意查看版本支持:https://helm.sh/zh/docs/topics/version_skew/
wget https://get.helm.sh/helm-v3.11.2-linux-amd64.tar.gz

# 解压
tar -zxvf helm-v3.11.2-linux-amd64.tar.gz

# 在解压目录中找到helm程序,移动到需要的目录中
mv linux-amd64/helm /usr/local/bin/helm

# 查看helm版本
helm version
# version.BuildInfo{Version:"v3.11.2", GitCommit:"912ebc1cd10d38d340f048efaf0abda047c3468e", GitTreeState:"clean", GoVersion:"go1.18.10"}
6.2 安装Nginx Ingress Controller
6.2.1 安装
# 下载安装包
wget https://raw.githubusercontent.com/kubernetes/ingress-nginx/controller-v1.5.1/deploy/static/provider/cloud/deploy.yaml

# 替换镜像为国内镜像地址
sed -i 's/registry.k8s.io/ingress-nginx/controller:v1.5.1@sha256:4ba73c697770664c1e00e9f968de14e08f606ff961c76e5d7033a4a9c593c629/registry.cn-hangzhou.aliyuncs.com/google_containers/nginx-ingress-controller:v1.5.1/g' deploy.yaml
sed -i 's/registry.k8s.io/ingress-nginx/kube-webhook-certgen:v20220916-gd32f8c343@sha256:39c5b2e3310dc4264d638ad28d9d1d96c4cbb2b2dcfb52368fe4e3c63f61e10f/registry.cn-hangzhou.aliyuncs.com/google_containers/kube-webhook-certgen:v1.5.1/g' deploy.yaml

# 安装
kubectl create -f deploy.yml
6.2.2 查看pod运行状态
kubectl get pods -n ingress-nginx

# 输出
NAME                                        READY   STATUS             RESTARTS        AGE
ingress-nginx-admission-create-gzlhn        0/1     Completed          0               5m35s
ingress-nginx-admission-patch-st5mz         0/1     CrashLoopBackOff   5 (2m21s ago)   5m35s
ingress-nginx-controller-7d9f587484-6x698   1/1     Running            0               5m35s

# 成功后再
NAME                                        READY   STATUS      RESTARTS   AGE
ingress-nginx-admission-create-gzlhn        0/1     Completed   0          13m
ingress-nginx-controller-7d9f587484-6x698   1/1     Running     0          13m
6.2.3 查看服务
kubectl get service ingress-nginx-controller --namespace=ingress-nginx

# 输出
NAME                       TYPE           CLUSTER-IP       EXTERNAL-IP   PORT(S)                      AGE
ingress-nginx-controller   LoadBalancer   10.200.242.222   <pending>     80:30814/TCP,443:32379/TCP   17m
6.2.4 验证
# 创建一个httpd web服务器, 端口80
kubectl create deployment demo --image=httpd --port=80

# 通过service暴露demo
kubectl expose deployment demo

# 创建一个ingress规则
kubectl create ingress demo-localhost --class=nginx   --rule="demo.localdev.me/*=demo:80"

# 设置端口转发
kubectl port-forward --namespace=ingress-nginx service/ingress-nginx-controller 8080:80

# 用curl命令访问,带上Host头
curl -iv http://localhost:8080 -H "Host:demo.localdev.me"

# 返回信息
<html><body><h1>It works!</h1></body></html>
创建ingress规则时,可能会报如下错误
error: failed to create ingress: Internal error occurred: failed calling webhook "validate.nginx.ingress.kubernetes.io": failed to call webhook: Post "https://ingress-nginx-controller-admission.ingress-nginx.svc:443/networking/v1/ingresses?timeout=10s": x509: certificate signed by unknown authority
执行以下命令解决:
kubectl delete -A ValidatingWebhookConfiguration ingress-nginx-admission
6.3 安装Rancher
6.3.1 添加 Helm Chart 仓库
执行 helm repo add 命令,以添加包含安装 Rancher 的 Chart 的 Helm Chart 仓库
# Stable:建议用于生产环境
helm repo add rancher-stable https://releases.rancher.com/server-charts/stable
6.3.2 为 Rancher 创建命名空间
定义一个 Kubernetes 命名空间,用于安装由 Chart 创建的资源。这个命名空间的名称为 cattle-system:
kubectl create namespace cattle-system
6.3.3 选择 SSL 配置
Rancher Management Server 默认需要 SSL/TLS 配置来保证访问的安全性。
你可以从以下三种证书来源中选择一种,用于在 Rancher Server 中终止 TLS:
- Rancher 生成的 TLS 证书:要求你在集群中安装 cert-manager。Rancher 使用 cert-manager 签发并维护证书。Rancher 会生成自己的 CA 证书,并使用该 CA 签署证书。然后 cert-manager负责管理该证书。
- Let's Encrypt:Let's Encrypt 选项也需要使用 cert-manager。但是,在这种情况下,cert-manager 与 Let's Encrypt 的特殊颁发者相结合,该颁发者执行获取 Let's Encrypt 颁发的证书所需的所有操作(包括请求和验证)。此配置使用 HTTP 验证(HTTP-01),因此负载均衡器必须具有可以从互联网访问的公共 DNS 记录。
- 你已有的证书:使用已有的 CA 颁发的公有或私有证书。Rancher 将使用该证书来保护 WebSocket 和 HTTPS 流量。在这种情况下,你必须上传名称分别为 tls.crt 和 tls.key的 PEM 格式的证书以及相关的密钥。如果你使用私有 CA,则还必须上传该 CA 证书。这是由于你的节点可能不信任此私有 CA。Rancher 将获取该 CA 证书,并从中生成一个校验和,各种 Rancher 组件将使用该校验和来验证其与 Rancher 的连接。
6.3.4 安装 cert-manager
这里使用 Rancher 生成的证书(ingress.tls.source=rancher),需要安装 cert-manager。
# 如果你手动安装了CRD,而不是在 Helm 安装命令中添加了 `--set installCRDs=true` 选项,你应该在升级 Helm Chart 之前升级 CRD 资源。
kubectl apply -f https://github.com/cert-manager/cert-manager/releases/download/v1.7.1/cert-manager.crds.yaml

# 添加 Jetstack Helm 仓库
helm repo add jetstack https://charts.jetstack.io

# 更新本地 Helm Chart 仓库缓存
helm repo update

# 安装 cert-manager Helm Chart
helm install cert-manager jetstack/cert-manager \
  --namespace cert-manager \
  --create-namespace \
  --version v1.7.1
安装完 cert-manager 后,你可以通过检查 cert-manager 命名空间中正在运行的 Pod 来验证它是否已正确部署:
kubectl get pods --namespace cert-manager

NAME                                      READY   STATUS    RESTARTS   AGE
cert-manager-5b97785fbd-mxdwz             1/1     Running   0          83s
cert-manager-cainjector-c8657d84f-kwbt2   1/1     Running   0          83s
cert-manager-webhook-8564679744-fwpxv     1/1     Running   0          83s
6.3.5. 根据你选择的证书选项,通过 Helm 安装 Rancher
不同的证书配置需要使用不同的 Rancher 安装命令,我们使用默认的rancher整数。
helm install rancher rancher-stable/rancher \
  --namespace cattle-system \
  --set hostname=rancher.xuhua.dev \
  --set bootstrapPassword=admin
- 将 hostname 设置为解析到你的负载均衡器的 DNS 名称。
- 将 bootstrapPassword 设置为 admin 用户独有的值。
- 如果你需要安装指定的 Rancher 版本,使用 --version 标志,例如 --version 2.3.6
https://kubernetes.io/zh-cn/docs/setup/production-environment/tools/kubeadm/high-availability/
https://developer.aliyun.com/article/1147479
https://github.com/kubernetes/kubeadm/blob/main/docs/ha-considerations.md#options-for-software-load-balancing
https://2fwww.dandelioncloud.cn/article/details/1568605731614322690
https://zhuanlan.zhihu.com/p/563177876